
Over the past few months, I’ve been working on a project that’s been both challenging and incredibly rewarding: building a home Raspberry Pi cluster for running containerized workloads. What started as a simple experiment in distributed computing has evolved into a production-ready platform that handles everything from home automation to monitoring services.
In this post, I’ll walk through the architecture decisions, the tools I chose, and some of the interesting problems I solved along the way. This isn’t meant to be a step-by-step tutorial, but rather a high-level overview of what’s possible when you combine affordable hardware with enterprise-grade orchestration tools.
What is a Cluster, and Why Build One? #
A cluster is simply a group of computers working together as a single system. The key benefit is resource pooling: instead of running services on individual machines, you treat multiple machines as one large pool of CPU, memory, and storage. This gives you better resource utilization, high availability, and the ability to scale services across multiple nodes.
For a home lab, clusters offer a practical way to learn distributed systems concepts, run multiple services efficiently, and experiment with production-grade tools without the cost of cloud infrastructure. A cluster of five Raspberry Pis can run dozens of containerized applications while consuming less power than a single desktop computer.
Architecture Overview #
My cluster consists of five Raspberry Pi nodes: one headnode and four workers. The headnode serves dual purposes – it acts as both a cluster server and a gateway between the internal cluster network and the internet. The workers are connected to a private internal network and route their traffic through the headnode.
Network Design #
The network topology is straightforward but effective:
Headnode: Has three network interfaces – one ethernet for the internal cluster network (192.168.30.0/24), one ethernet for internet connectivity, and a WiFi interface as a backup connection. The headnode performs NAT and IP forwarding, allowing worker nodes to access the internet while remaining on an isolated network.
Worker Nodes: Each worker has a single ethernet connection to the internal network, with the headnode as their default gateway.
This design provides network isolation for the cluster while maintaining internet access for pulling container images and accessing external services. It also simplifies firewall management since all external traffic flows through a single point.
Why Nomad Instead of Kubernetes? #
This might be the most common question I get when discussing this project. Kubernetes is the dominant container orchestration platform, so why choose HashiCorp Nomad instead?
The answer comes down to complexity and resource requirements. Kubernetes is powerful, but it’s also heavy. Running a full Kubernetes control plane on Raspberry Pi hardware means dedicating significant resources just to the orchestrator itself. K3s and other lightweight Kubernetes distributions help, but they’re still more complex than necessary for a home lab.
Nomad, by contrast, is remarkably simple. It’s a single binary with no external dependencies beyond Consul for service discovery. The entire control plane runs comfortably on a Raspberry Pi with resources to spare. The API is straightforward, the job specification format is clear and readable, and the operational overhead is minimal.
More importantly, Nomad doesn’t lock you into a single workload type. While it excels at running Docker containers, it can also orchestrate VMs, Java applications, static binaries, and more through its flexible driver system. For a home lab where you might want to experiment with different technologies, this flexibility is valuable.
Service Discovery with Consul #
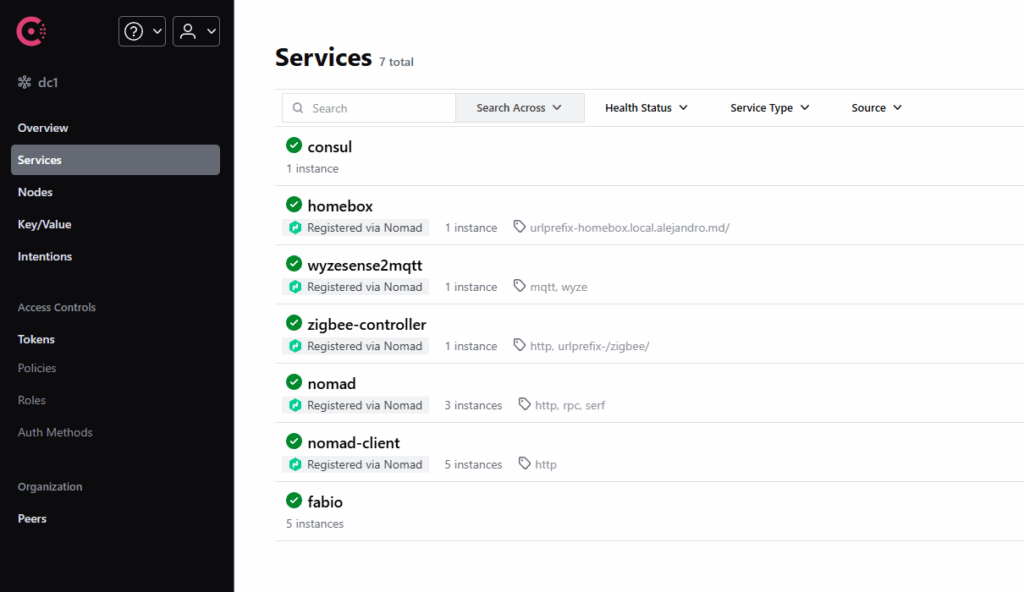
Nomad works hand-in-hand with HashiCorp Consul for service discovery and health checking. Every service registered in Nomad automatically appears in Consul’s service catalog with health check information. This makes it trivial for services to discover each other without hardcoding IP addresses or ports.
For example, when I deploy Prometheus for monitoring, it uses Consul’s API to automatically discover all node-exporter instances across the cluster. When I add a new worker node, Prometheus immediately starts collecting metrics from it without any configuration changes. This dynamic service discovery is one of the killer features of the Consul + Nomad combination.
Consul also provides a distributed key-value store, which I use for storing application configurations. Services like Zigbee2MQTT and XBee2MQTT pull their configurations from Consul at startup, making it easy to update settings without rebuilding containers or editing files on individual nodes.
Automation with Ansible #
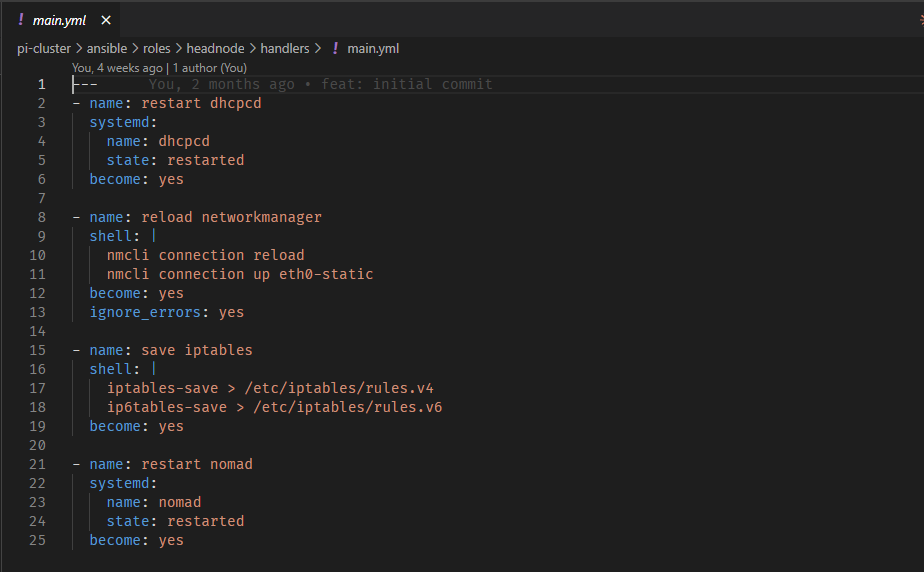
Setting up a cluster manually would be tedious and error-prone. Ansible handles all the automation, from initial node configuration to deploying HashiCorp tools and managing system updates.
The Ansible structure is organized into roles:
base: Handles common configuration like installing Docker, setting up log2ram (to reduce SD card wear), configuring cgroups for container resource limits, and system hardening.
headnode: Configures network interfaces, sets up NAT and IP forwarding, and installs Nomad and Consul in server mode.
worker: Installs Nomad and Consul in client mode and configures them to connect to the headnode.
One particularly useful feature is the USB device metadata system. Each node can have USB devices (like Zigbee controllers or sensor bridges) attached, and these devices are registered as metadata in Nomad. This allows jobs to use constraints to ensure they run on the correct node. For instance, my Zigbee2MQTT job includes a constraint that it must run on the node with the ConBee II adapter.
Storage: From Host Volumes to SMB CSI #
Storage in a clustered environment is always interesting. Initially, I used Nomad’s host volumes, which work well for node-specific data. However, for data that needs to be accessible from any node or that should survive node failures, I needed something more robust.
The solution was implementing the SMB CSI (Container Storage Interface) plugin. This allows Nomad to mount network shares (from a NAS or file server) as persistent volumes that can be attached to containers. The setup involves running two jobs: a controller plugin that manages volume lifecycle, and a node plugin that runs on every worker to handle the actual mounting.
With SMB CSI in place, I can create volume definitions that point to specific subdirectories on a network share, and any job can request that volume. When a job moves between nodes (due to failures or rescheduling), the volume follows it. This is particularly useful for services like Grafana, where you want dashboard data to persist regardless of which node the container runs on.
Real-World Workloads #
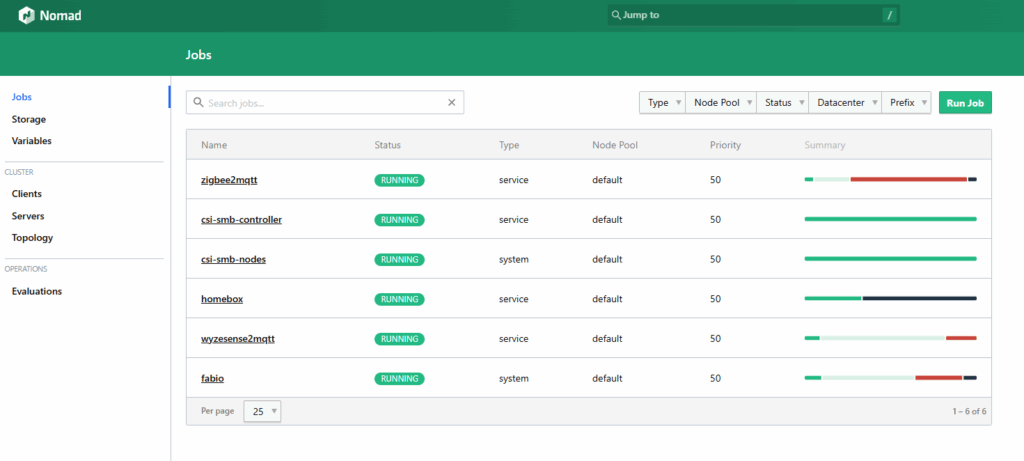
The cluster currently runs a mix of infrastructure services and home automation components:
Infrastructure:
- Fabio: A zero-configuration load balancer that automatically routes HTTP traffic based on service tags in Consul. Services just tag themselves with routing rules, and Fabio handles the rest.
- Prometheus & Grafana: Monitoring and visualization for cluster health, resource usage, and service metrics.
- Node Exporter: Runs on every node to collect system-level metrics.
Home Automation:
- Zigbee2MQTT: Bridges Zigbee devices to MQTT for integration with Home Assistant.
- XBee2MQTT: Similar bridge for XBee sensor networks.
Applications:
- GitHub Runners: Self-hosted CI/CD runners for automated builds and tests.
- Homebox: Inventory management application.
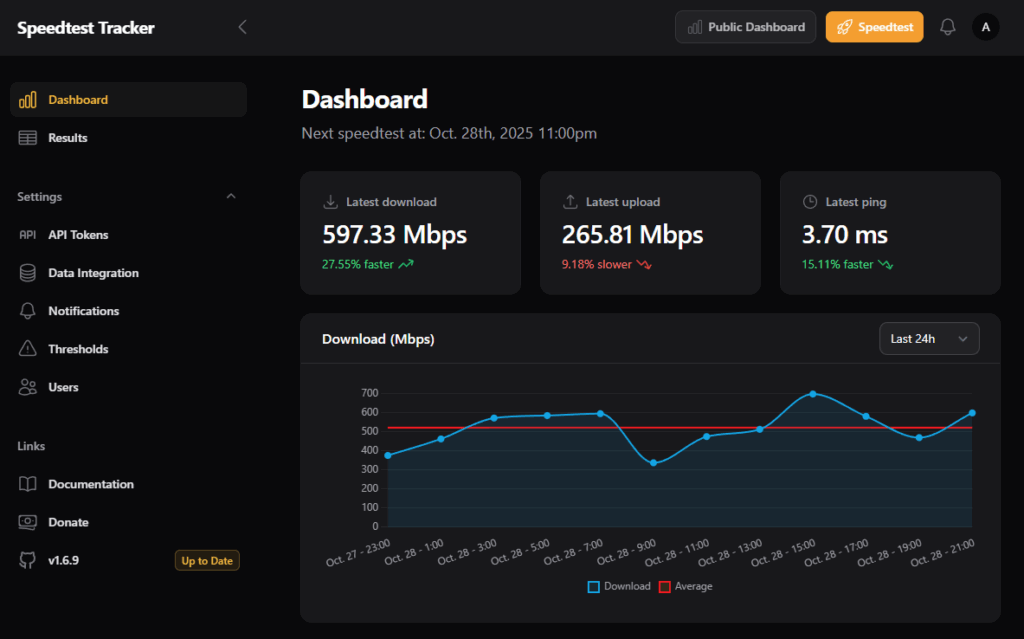
- Speedtest Tracker: Monitors internet connection performance over time.
Each of these runs as a Nomad job, with resource limits, health checks, and automatic restarts if they fail. The total resource consumption is surprisingly low – most jobs use under 256MB of RAM and minimal CPU, leaving plenty of headroom for additional services.
Solving Interesting Problems #
QR Code WiFi Provisioning #
The headnode has a WiFi adapter for backup internet connectivity, but changing WiFi networks traditionally requires SSH access or a monitor and keyboard. I wanted a more elegant solution for headless WiFi provisioning.
The answer: QR codes and a Raspberry Pi Camera. I built a service that continuously scans for WiFi QR codes using the camera module. When it detects a QR code with WiFi credentials (in the standard WIFI: format), it automatically configures NetworkManager and connects to the network.
Now, changing WiFi networks is as simple as generating a QR code on your phone and holding it up to the camera. The system remembers all previously configured networks and uses priority values to determine which network to prefer when multiple are in range. It’s a surprisingly effective solution that requires no additional hardware beyond the camera module.
Configuration Management with Consul Templates #
Rather than baking configuration files into container images or managing them as static files, I use Consul’s key-value store combined with Nomad’s template feature. Job specifications include template blocks that pull configuration from Consul and render it to files at runtime:
template {
  data = <<EOH
{{ key "services/zigbee2mqtt/configuration.yaml" }}
EOH
  destination = "local/config/configuration.yaml"
  change_mode = "restart"
}
When the Consul key changes, Nomad automatically updates the file and restarts the service. This makes configuration updates simple and auditable – just update the value in Consul, and the service picks it up automatically.
Performance and Resource Usage #
One of the pleasant surprises has been how efficiently the cluster runs. Even with a dozen services running across five nodes, CPU usage rarely exceeds 20%, and memory usage is comfortable. The lightweight nature of Nomad and Consul means the orchestration layer itself consumes minimal resources.
Power consumption is another win. The entire cluster, including a small network switch, draws approximately 25-30 watts under typical load. That’s less than many single-board computers or NAS devices, yet provides significantly more flexibility and computing power.
Lessons Learned #
Start simple: I initially tried to replicate production Kubernetes patterns, which was overkill for a home lab. Nomad’s simpler model was a better fit and easier to reason about.
Automation pays off: The time invested in Ansible playbooks has repaid itself many times over. Being able to rebuild nodes from scratch or add new workers with a single command is invaluable.
Monitoring is essential: Without Prometheus and Grafana, I would have no visibility into cluster health or resource usage. These should be among the first services you deploy.
Storage is hard: Even in a simple cluster, persistent storage requires thought. The SMB CSI solution works well, but it took experimentation to get right.
Use Cases and Future Plans #
The current cluster handles several practical workloads, but there’s room for expansion:
- Edge computing: The cluster is well-suited for processing IoT sensor data locally before sending summaries to the cloud.
- CI/CD: Self-hosted GitHub runners provide free build capacity for personal projects.
- Media services: Plex, Jellyfin, or other media servers could run comfortably on this hardware.
- Development environments: Nomad can run development databases, caches, and other services on-demand.
- Learning platform: It’s an excellent environment for learning distributed systems, networking, and container orchestration.
Future improvements might include:
- Multi-region setup: Adding nodes in different physical locations with WireGuard tunnels for geographic distribution.
- GPU workers: Raspberry Pi 5 or other SBCs with GPU support for machine learning workloads.
- Advanced networking: Experimenting with service mesh technologies like Consul Connect for encrypted service-to-service communication.
Conclusion #
Building a Raspberry Pi cluster with Nomad and Consul has been an excellent learning experience and resulted in a genuinely useful piece of infrastructure. The combination of affordable ARM hardware and enterprise-grade orchestration tools creates a powerful platform for running containerized workloads at home.
If you’re interested in distributed systems, container orchestration, or just want a flexible home lab platform, I highly recommend giving Nomad a try. It’s simpler than Kubernetes, lighter on resources, and perfectly capable of handling real workloads. The barrier to entry is low – you can start with a single node and add workers as needed.
The best part? Unlike cloud infrastructure, there are no usage charges. Once you’ve purchased the hardware, you can run as many services as you want, experiment freely, and learn without worrying about surprise bills at the end of the month.
References #
- HashiCorp Nomad Documentation: https://developer.hashicorp.com/nomad/docs
- HashiCorp Consul Documentation: https://developer.hashicorp.com/consul/docs
- Fabio Load Balancer: https://github.com/fabiolb/fabio
- SMB CSI Driver: https://github.com/kubernetes-csi/csi-driver-smb
- WiFi QR Code Format: https://github.com/zxing/zxing/wiki/Barcode-Contents#wi-fi-network-config-android-ios-11
Discover more from The Maker Shed
Subscribe to get the latest posts sent to your email.