
So looking around in the interballs, I came across a forum post detailing a mod that is commonly done to the US version Mazda 6 2000-2007 to make the tail lights turn on when the brakes are applied, as they normally only work when the parking lights are on. I realized then that my car being an European version, it would take a little bit more of effort.
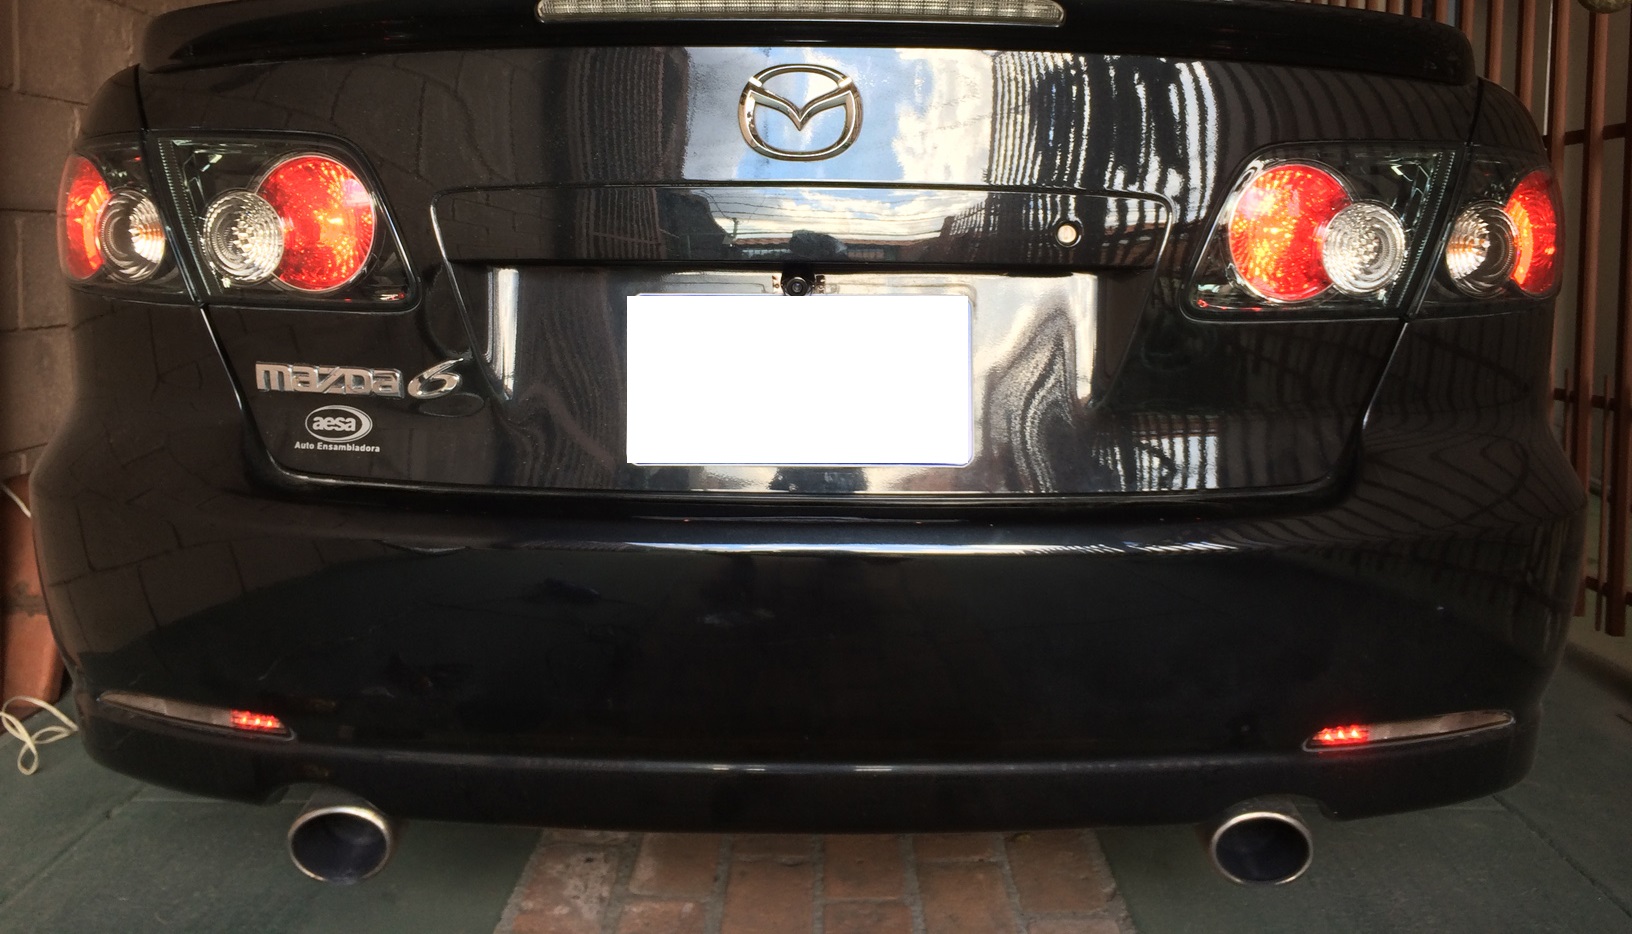
The European version of the Mazda 6 doesn’t even come with break lights in the tail gate. The only lights that came with it are for reverse. So I decided it would be cool to get the lights working with the parking lights, and do the brake mod at the same time.
Tools
For this mod you will be using a couple of things.
- 10mm Socket.
- Soldering Iron.
- Solder (duh)
- Heatshrink tubing.
- Cable Cutter.
- Cable Stripper/Peeler.
- Wire in different colors and lengths.
- Dremel tool (for sanding, as cutting is messy)
- Files
- Drill
- 3/4 Spade bit.
- Small flat screwdriver.
- Multimeter.
Required Parts
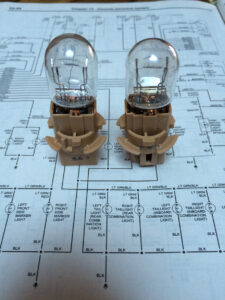
To make things a little easier, and get some of the stuff I needed I ordered a trunk wire harness the same year as my car. I reckon all of them potentially work if its from the same generation. but I wanted to make sure. Also, from a previous trip to the States, I manage to salvage an old 2003 Mazda 6 that was sitting around at a junk yard. From there I got the necessary bulbs and bulb sockets needed for this mod.
- Mazda 6 Trunk wire harness.

- Bulbs with their sockets.
Guide
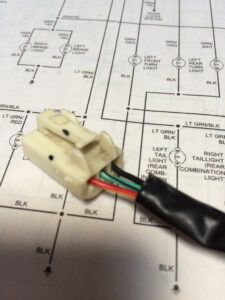
We start by getting two of the connectors on our new/used extra wire harness. Specifically the brake light connector and the reverse light connector.
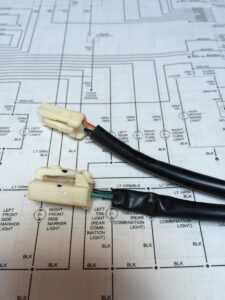
Take the reverse light connector, turn it upside down an notice the little notch, we have to open that up to be able to remove one of the cables from the connector. In this case the Red/Yellow cable. Use a the small flat screwdriver to get that open.
When the notch is in its opened position, you will see two tabs inside, you have to apply force to bend them towards the center to be able to release the cable connector. Light force is required.
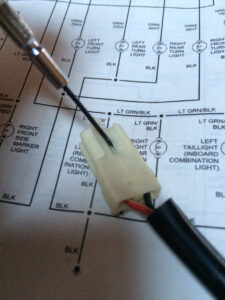
When you have your connectors free. Take the one you want to use, and insert it into the brake light connector. It turns out they are an exact match!
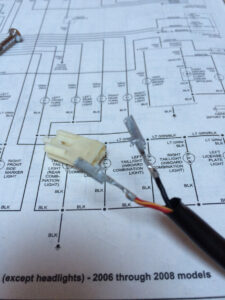
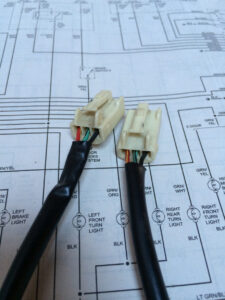
Repeat the same process for the other brake light/reverse light connectors, remember we need two of them
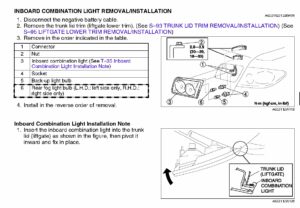
Remove the trunk trim

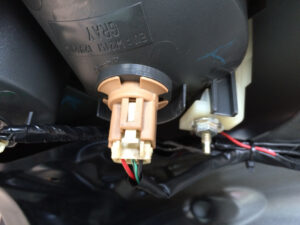
After that, remove the inboard combination lights, using following procedure.
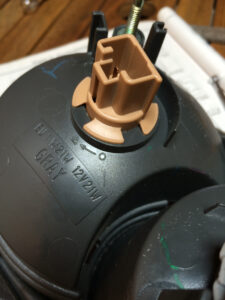
You will notice (not much in the picture) that there is a faded cutout of the socket hole. This will serve us as guide to cut the hole for the bulb sockets.

After a painful hour of cutting filing and sanding, you will have yourself a socket hole. I didn’t took pictures of the process, so I’ll just describe my findings:
- Try not to use a dremel, it will create hundreds of little plastic shavings you wouldn’t be able to remove easily.
- Use the spade drill bit to create the initial hole, you will notice you won’t have as much dust as with dremel (learned hard way).
- Sand it using the dremel tool with some sanding bit until you can easily fit the socket inside and turn it with no effort.
- Use a file to sand off the receiving end of the little plastic guides on the bulb socket, until the socket guides can enter in and out without effort.
- Sand sand sand!! (patience is a virtue)
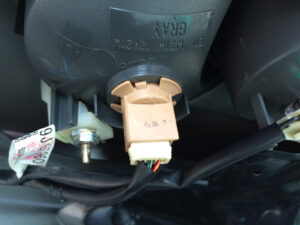
You will get something like this:
Neat huh? Now, assemble everything back the way it was in your car. It’s soldering iron time.
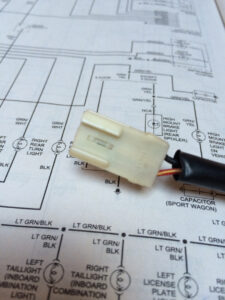
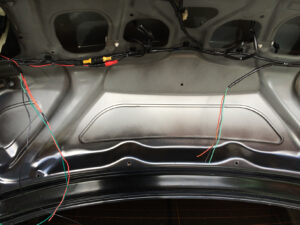
Extend the cables to required length, basically just to be able to merge both of the connectors you previously made. Of course this means you have to cut them off of the extra wire harness you purchased.
Also in order to perform the Brake mod, you will have to run a wire from the left brake light to your tailgate, that means you have to run it through the rubbery loom protector, just use a thick wire to fish it out, or use a wire fisher. the spoiler 3rd brake light if you have that available, splicing the positive cable, I chose red as my break light cable. (you can follow the forum post)
Connect everything up and you will have something like this (including red cable for brake light I painfully fish out):
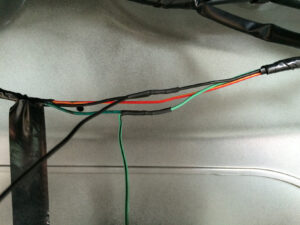
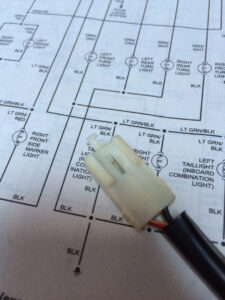
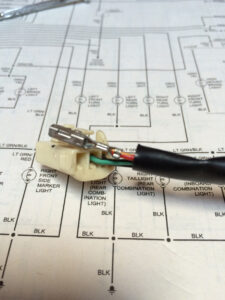
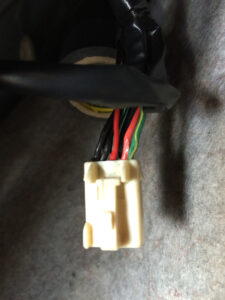
Splice the remaining green, and black cable into the license plate wires. Make sure to identify the positive and negative cable. In my case both of the cables were black, so I had to use a multimeter to figure out ground. Make sure you do this! if you connect it backwards nothing good will come out!
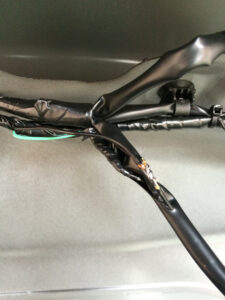
Use electrical tape and zip ties to secure everything into the right place.
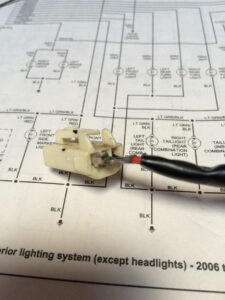
Solder the red cable into your left rear brake light connector (the one in the body of the car, not in the trunk lid), in my case it’s connected to a Green/Yellow cable, this cable goes to +12v when brakes are applied. Which in turn will power the second filament in our tailgate bulbs.
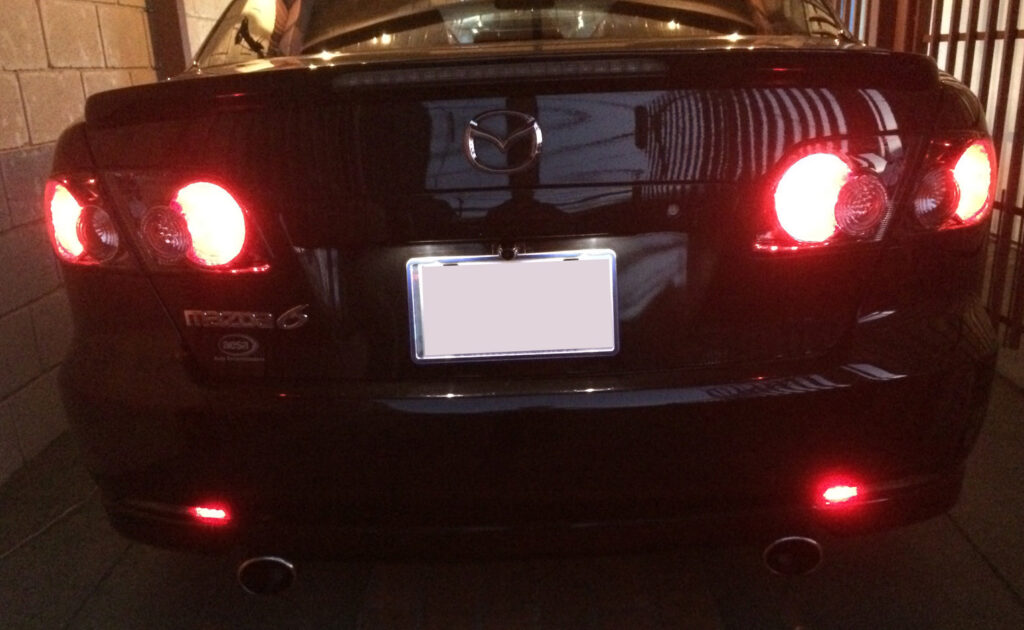
Connect everything the way it was, assemble back your trunk trim, turn on the parking lights and get ready for some mad braking!
If you have any question or comment, feel free to post them below.
Leave a Reply